Custom HubSpot Email Template
If you’re an email developer using HubSpot, you probably know there are a few ways to create emails on the platform. One of the easiest ways is using their drag-and-drop builder, where you can drag elements into the email and reorder them. But, as we developers know, it doesn’t allow for fully customized designs and creates a LOT of code bloat.
You can code a custom HubSpot email template, of course. But the question is, how do you create a template that meets design requirements while allowing yourself, your co-workers, or your clients to create emails without needing to edit code? You can use Tags, but is there a way to make it even more flexible?
That’s what this post is all about! By the end, you will know how to build a custom HubSpot email template for anyone to edit AND reorder the content using HubSpot’s UI.
Note: I am assuming that you already have some familiarity with coding email templates in HubSpot. I highly recommend reviewing their Developer Documentation for more detailed HubL information.
Step 1: Code Your HTML Template
This step is optional, but if you’re like me, I find it helpful to code a new email template in HTML and CSS on its own before implementing ESP-specific code like HubL. It allows me to create all the different blocks/sections of the email, determine the similarities that are shared across them (this will help to inform how to build the HubL part!), and test the template across email clients for any rendering issues.
To begin, Design Tools is where you’ll save your email template. Right-click the folder you want to create your template in and choose New File. Pick HTML + HubL, and then follow the prompts from there to create a template for email.
Step 2: Create Your Custom Module
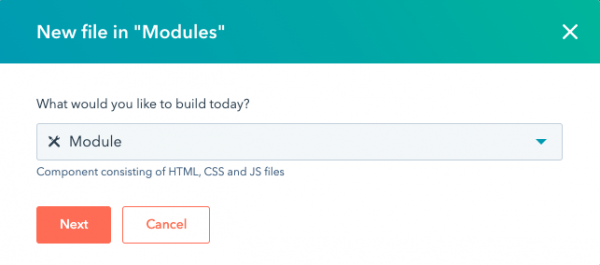
Once your email template is ready, the next step is to create a custom module. Right-click the folder you want to save your module in and choose New File. From the dropdown, pick Module.
In the next step, the module is for Emails, and the scope is Local. These settings allow the template to be used across multiple emails while having unique content for each email. Name your file whatever you like. In this example, I called it Content.
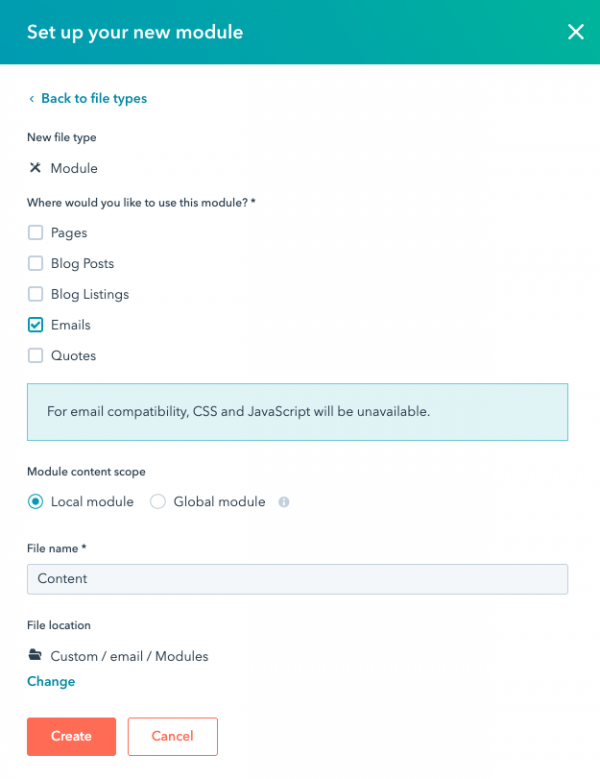
Once created, on the right-hand side, give your module a Label name. I used Content Blocks. Next, we add our first couple of fields to help set up our module by clicking on Add Field.
Step 3: Module Settings
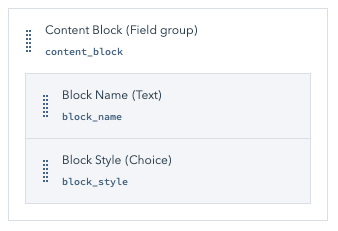
The first field we add is a text field called Block Name. It will allow you to give a name to each “block” or section of your email, making it easier to know which is which when building an email using the template.
The second is a choice field called Block Style. This field is where you can add options for the different block styles or layouts of the email (one column, two columns, etc.) to choose from when building the email.
Under Actions, group the two fields to create a field group. I called this group Content Block:
While inside the field group (click Edit on the field group), scroll down to the Repeater Options section and turn it on. Choose Block Name for the object sorting label. Doing this allows you to create multiple blocks/sections in the email and see the Block Name when building the email. You’ll see later on how helpful this is!
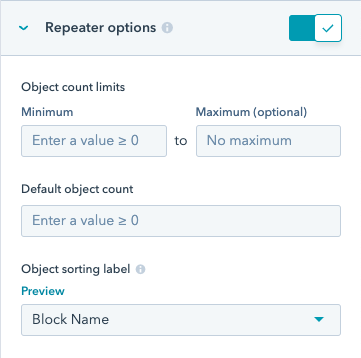
You can also set your minimum and maximum for the number of blocks in the email. I believe a recent HubSpot update now requires a minimum.
Step 4: Add Your Content Fields
Now that it’s set up, it’s time to add all the fields to the module based on your custom HubSpot email template that will allow inputting content into the email. It will vary based on the email design, but here are some helpful tips:
- Use a field group per block style! Each unique block style of your email should be its own field group and given a name that matches the options provided in the Block Style choice field. For example, if you have a one-column layout, you’ll have a One Column option in the Block Style field and a One Column field group that holds all the content fields for that layout.
- Think about the similarities between blocks/sections of the design. You may have multiple one-column layouts, but they could all potentially use the same field group. Use different field types to provide options or settings to pick from to achieve each design.
- All your field groups for each block style should be nested inside of the Content Block field group from the last step.
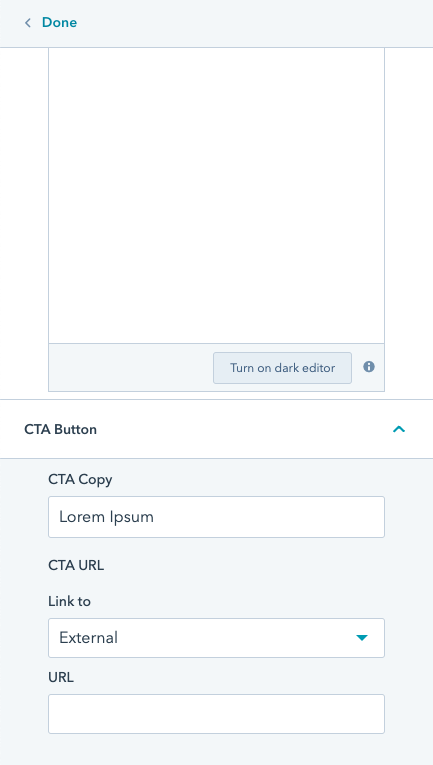
- You can also use field groups to group fields within a block style, like multiple fields for a CTA button.
- At the time of writing, nesting can only go five deep! Keep that in mind.
- You can choose how strict you want or need to be with field settings. For example, you may want to turn off the Available Size Options setting for the image fields and use other fields (like a Choice field) to provide the end user with various image sizes to pick from.
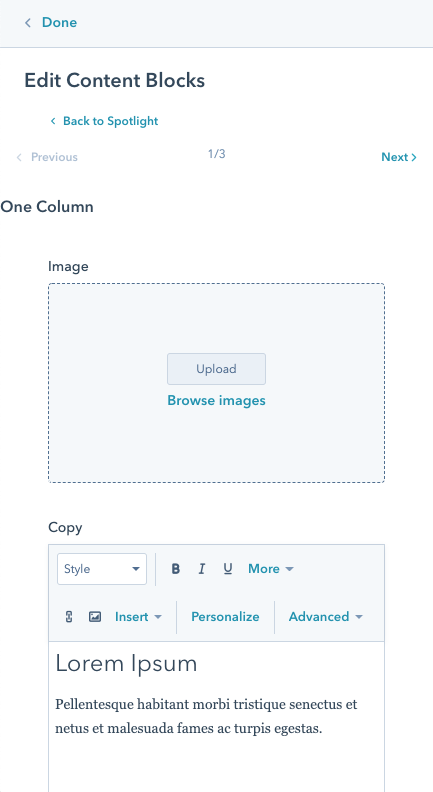
Here is an example I set up with a one-column layout. I put in fields for an image, rich text for copy, and single-line text and URL fields for a CTA button grouped together.
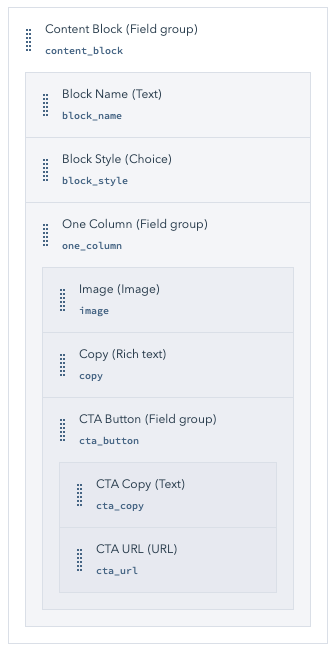
What you add will entirely depend on your email template, but you can add fields for options like choosing a background colour, adding borders, hiding or showing content, CTA button styles, etc. The sky is the limit to what you can do!
Step 5: Combine HubL With Your HTML
Once your module is fully set up with all the fields you need, the next step is to output the content by combining your template’s HTML with HubL from the module. The HTML you put into the module file’s editor is only for the content blocks from your template.
HubSpot is helpful as it provides HubL output, which you can use to build everything together. You can get this code by clicking Actions on the Content Block field group and choosing Copy Snippet, and then paste the code into the editor.
Taking the one-column example from above, this is the initial HubL output I get:
{% for item in module.content_block %}
    {% inline_text field="block_name" value="{{ item.block_name }}" %}
    {{ item.block_style }}
    {% if item.one_column.image.src %}
        {% set sizeAttrs = 'width="{{ item.one_column.image.width }}" height="{{ item.one_column.image.height }}"' %}
        {% if item.one_column.image.size_type == 'auto' %}
            {% set sizeAttrs = 'width="{{ item.one_column.image.width }}" height="{{ item.one_column.image.height }}" style="max-width: 100%; height: auto;"' %}
        {% elif item.one_column.image.size_type == 'auto_custom_max' %}
            {% set sizeAttrs = 'width="{{ item.one_column.image.max_width }}" height="{{ item.one_column.image.max_height }}" style="max-width: 100%; height: auto;"' %}
        {% endif %}
        {% set loadingAttr = item.one_column.image.loading != 'disabled' ? 'loading="{{ item.one_column.image.loading }}"' : '' %}
        <img src="{{ item.one_column.image.src }}" alt="{{ item.one_column.image.alt }}" {{ loadingAttr }} {{ sizeAttrs }}>
    {% endif %}
    {% inline_rich_text field="one_column.copy" value="{{ item.one_column.copy }}" %}
    {% inline_text field="one_column.cta_button.cta_copy" value="{{ item.one_column.cta_button.cta_copy }}" %}
    {{ item.one_column.cta_button.cta_url.href }}
{% endfor %}
It has some code I don’t need, such as code for the image field. I want to control that output all myself, plus I need to incorporate this with my code. But it’s helpful to start with, and I like to keep it at the bottom of the editor and pull out what I need.
Combining the HubL I need from above with the HTML from my template looks something like this:
{% for item in module.content_block %}
<table border="0" cellspacing="0" cellpadding="0" role="presentation" width="100%">
{% if item.one_column.image.src %}
<tr valign="top">
<td valign="top" align="center">
<img src="{{ item.one_column.image.src }}?noresize" alt="{{ item.one_column.image.alt }}" width="600" style="display: block; border: 0px; font-size: 12px; width: 600px; max-width: 100%; height: auto;">
</td>
</tr>
{% endif %}
<tr valign="top">
<td valign="top" align="center" style="padding: 20px;">
<!--[if (gte mso 9)|(IE)]>
<table border="0" cellspacing="0" cellpadding="0" role="presentation" align="center" style="width: 400px;">
<tr valign="top">
<td valign="top" align="center">
<![endif]-->
<table border="0" cellspacing="0" cellpadding="0" role="presentation" width="100%" style="max-width: 400px;">
<tr valign="top">
<td valign="top" align="left" class="richtext">
{% inline_rich_text field="one_column.copy" value="{{ item.one_column.copy }}" no_wrapper=true %}
</td>
</tr>
<tr valign="top">
<td valign="top" align="left" style="padding: 10px 0 20px;">
<a href="{{ item.one_column.cta_button.cta_url.href }}" style="display: inline-block; mso-padding-alt: 0; padding: 15px; background-color: #000000; text-decoration: none; text-underline-color: #000000; font-family: Arial, sans-serif; font-size: 16px; line-height: 18px; color: #ffffff; font-weight: bold;"><!--[if mso]><i style="letter-spacing: 15px; mso-font-width: -100%; mso-text-raise: 30pt;" hidden> </i><![endif]--><span style="mso-text-raise: 15pt;">{% inline_text field="one_column.cta_button.cta_copy" value="{{ item.one_column.cta_button.cta_copy }}" no_wrapper=true %}</span><!--[if mso]><i style="letter-spacing: 15px; mso-font-width: -100%;" hidden> </i><![endif]--></a>
</td>
</tr>
</table>
<!--[if (gte mso 9)|(IE)]>
</td></tr></table>
<![endif]-->
</td>
</tr>
</table>
{% endfor %}
Since we set it up to be a repeater, you’ll see the entire block is wrapped in a for loop. If you had multiple block styles, you would also use if/else statements to check for the styles. Example:
{% for item in module.content_block %}
    {% if item.block_style == "one_column" %}
        ...One column here...
    {% elif item.block_style == "two_column" %}
        ...Two column here...
    {% endif %}
{% endfor %}
A few tips that may help you when combining your HTML and HubL:
- Since the HubL snippet from HubSpot outputs code for all the fields, there will be some like for the Block Name that isn’t needed and can be ignored.
- Add
?noresizeto the end of your image URLs. It will prevent HubSpot from adding a bunch of extra stuff to the end of the URL, which can create code bloat. - I like to use
no_wrapper=trueon all text and rich text fields to control the code that wraps around the copy. Again, it reduces code bloat.
I also added class="richtext" on the cell containing the rich text field, which allows you to directly target and style any elements (copy or otherwise) in the rich text editor when creating an email. To do this, in your main template file you’ll need to include HubSpot’s inline style tag and add any styles applicable to the rich text field:
<style type="text/css" media="screen" id="hs-inline-css">
    /* HubSpot Inlined Styles */
</style>
HubSpot will then automatically inline these styles for you.
Step 6: Add the Module to Your Template
Once fully complete, it’s time to add the module to your template file. HubSpot makes this easy by providing a code snippet. On the right-hand side under Template Usage you’ll find a line of code. It looks something like this:
{% module "module_165972498013048" path="/Custom/email/Modules/Content", label="Content" %}
You’ll paste this into your email template where your repeatable content blocks go. I like to duplicate the template first, so I have a copy of the original.
Step 7: Create Your Email
You’ve now built your custom HubSpot email template with a module that has a repeatable content area! The next step is to use your template to create an email.
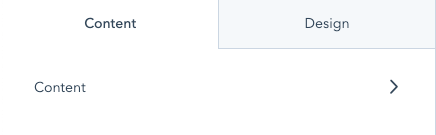
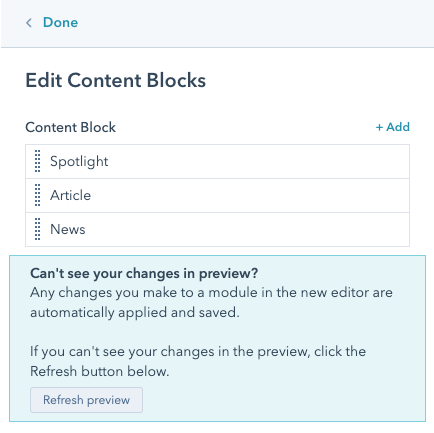
Create a new email and choose the template you just built. On the left-hand side, you’ll see the section Content in the Content tab.
Click on Content, and you may already see a block if you previously put in a minimum number. If not, click on Add.
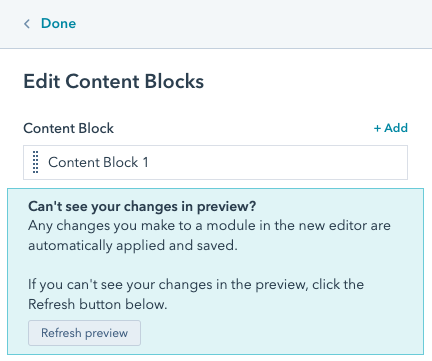
You can click on Add to add more content blocks as you need, and even click and drag to reorder them! It isn’t the same as dragging and dropping elements into the email on the right, but it still allows for reordering the blocks.
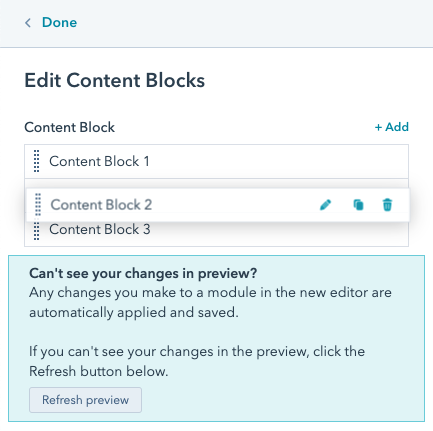
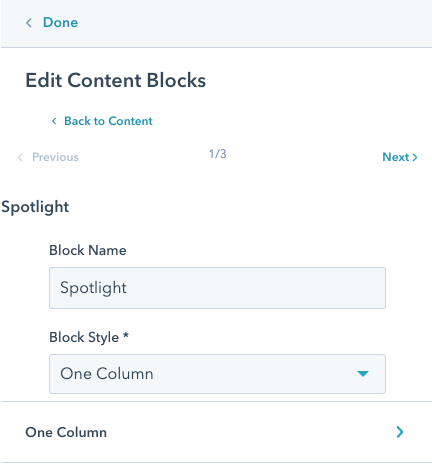
Click on the first block to edit it. Give the block a name, choose the style, and then click One Column below the Block Style to the next step.
You’ll see all the fields you included for that block style. You can go through and fill out everything, choose your options, etc. One bug I do find is HubSpot will scroll to the top of the email preview on the right when first editing the content. It’s a little annoying, but worth it to get the flexibility!
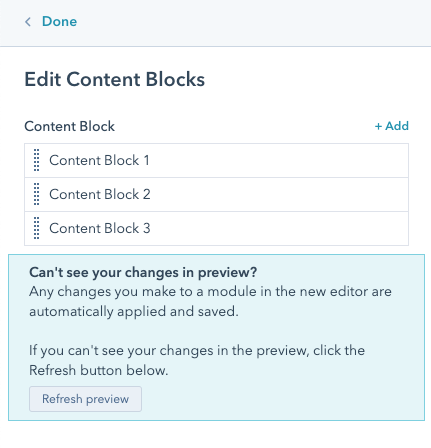
Once you have done that for all the modules, you’ll know which block is which from the blocks’ names, instead of just “Content Block #”!
Play around with building the email. You’ll want to test any options you’ve set up with the fields and try to break them to see if you need to adjust any field settings or make changes to the code.
That’s It!
Hopefully, there will be a day when custom templates can fully integrate with HubSpot’s drag-and-drop capabilities, like their CMS. Until then, you know how to build a custom HubSpot email template for anyone to edit and reorder the content in HubSpot’s UI.
Questions? Happy to chat over on Twitter or the Email Geeks Slack.